Portkeys BM5 III WR 5.5" HDMI Touchscreen Monitor with Camera Control for RED KOMODO
- 貨存:
- ssp0mk0
- *以上貨存僅供參考,實際貨存需致電查詢。
- 運費:
品牌: Portkeys SKU:YK9240
詳細描述
Support Camera
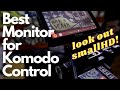
- Support Wi-Fi control RED Komodo
- Bluetooth control BMPCC 4K, 6K, 6K Pro
- Wired control of Sony, Canon, Panasonic, BMD, and ZCam E2.
- It also supports motor control of the Tilta Nucleus N/M.
- It allows you to control the focus of Komodo, BGH1, E2 via the touch screen.
Camera Control
Portkeys BM5 WR comes with a wireless control module specially designed to connect with RED Komodo wirelessly. The BM5 WR with Camera Control maintains the same reliable BM5 clarity, vivid color details, and dynamic touch screen camera control.
Robust design
Rugged aluminum alloy shell design, durable and lightweight. BM5 WR uses a sturdy aluminum alloy shell and weighs only 376g, which can withstand heavy daily operations, so it is easy to carry when shooting.
2200nits Super Bright, Sees Everything Clearly in Daylight
Portkeys BM5 WR offers a 2200nits ultra-high brightness 5.5-inch display with a clear resolution, excellent color, and contrast, and precise image control.
HDMI/SDI Loop Out
The SDI input provides real-time monitoring. SDI OUT can output an image superimposed with 3DLUT and a new peak.
Color calibration
Each BM5 WR has passed strict hardware color calibration before shipping to ensure the widest color gamut and the most accurate colors.
10-bit (8+2 FRC)
The 10-bit color depth makes the display color reproduction more accurate, the image quality is more delicate, and the level is richer.
New Peaking
The optimized new peaking algorithm can accurately capture the subtle facial focus. IRE can be set freely for ARRI false color.
High-precision Waveform
The high-precision full-screen waveform can accurately capture 1920X1080 pixels frame by frame.
Semi-Transparent Superimposable Frozen Frame Image
The freeze-frame can be semi-transparently superimposed on the HDMI or SDI video so that the photographer can correct the displacement.
Tilta Cursor Display
The BM5 III-WR can display the position of the iron head wireless follow the focus scale. All in all, it can provide professional content creators with reliable tools for various scenario
Videos
View AllClose商品規格
牌子: |
Portkeys |
型號: |
BM5 V2 |
屏幕: |
5.2 英寸的觸控式螢幕 |
分辨率: |
1920x1080 |
輸入信號: |
HDMI / SDI |
亮度: |
2200nit |
色深: |
8bit |
背光源: |
WLED |
材質: |
鋁合金 + 鋼化玻璃 |
輸入電壓: |
4pin DC 7-24V |
消耗功率: |
9.5-16W |
適用鋰電池: |
SONY NP-F系列, NP-FM/QM系列 |
儲存溫度: |
-20℃~60℃ |
尺寸: |
141 x 83 x 34mm |
重量: |
350g (不包括電池) |
運送方式
門市自取:
不用支付運費,當貨品準備好後,我們會發短訊通知您,您可選擇深水埗或旺角門市取貨,取貨時出示短訊即可。
順豐速運
首1kg 運費 HK$30,後續重每0.5 kg HK$6。
快件重量計算方式為實際重量或材積重量,取較重者。材積重量計算公式為: 長X闊X高(cm) / 6000。
速遞服務不適用於防潮箱、背景紙及其他大型貨品,大型貨品會使用貨車運送。
有現貨商品一般會於落單後下一個工作天送出。送出後約1-3天送到,到達時間有機會因物流公司情況而延遲。
貨車到付
如購買防潮箱、背景紙及其他大型貨品,客人可使用自費客貨車送貨,我們可代為安排客貨車,買方需負責所有運送相關費用。貨車會由深水埗開出,有現貨商品一般最快可安排翌日送貨,當貨品準備好後,我們會聯絡您相約送貨時間,您需到樓下可停車處取貨及支付車費,司機會於出車前聯絡您確認收貨地點,客貨車運費可參考下表。收貨時請務必接聽電話。背景紙需加收$15拆半網費。星期日及公眾假期需收取$20付加費。如需進入停車場或超時等候,買方需要支付額外付加費。如司機因未能聯絡收貨人而折返,買方需支付額外來回運費。以下價格只供參考,實際價錢可能相差~$10,價錢未包括隧道費,以客貨車報價為準。 送貨上門服務費用另議($300起)。
九龍 | 港島 | 新界 | |||
深水埗 | ~$60 | 灣仔 | ~$140+隧 | 大圍 | ~$100+隧 |
長沙灣 | ~$60 | 銅鑼灣 | ~$140+隧 | 沙田 | ~$100+隧 |
美孚 | ~$65 | 北角 | ~$140+隧 | 火炭 | ~$100+隧 |
大角咀 | ~$65 | 鯽魚涌 | ~$140+隧 | 深井 | ~$105 |
旺角 | ~$65 | 筲箕灣 | ~$140+隧 | 井欄樹 | ~$105 |
油麻地 | ~$65 | 跑馬地 | ~$145+隧 | 九肚山 | ~$110 |
佐敦 | ~$70 | 柴灣 | ~$145+隧 | 馬鞍山 | ~$115+隧 |
九龍城 | ~$70 | 港大 | ~$155+隧 | 中大 | ~$115+隧 |
葵涌 | ~$70 | 西環 | ~$145+隧 | 小欖 | ~$120 |
荔景 | ~$70 | 西營盤 | ~$145+隧 | 科大 | ~$125 |
尖沙咀 | ~$70 | 上環 | ~$145+隧 | 大埔 | ~$130+隧 |
九龍塘 | ~$75 | 中環 | ~$145+隧 | 馬灣 | ~$130+隧 |
荃灣 | ~$75 | 黃竹坑 | ~$145+隧 | 屯門 | ~$135 |
何文田 | ~$75 | 渣甸山 | ~$150+隧 | 藍地 | ~$145 |
紅磡 | ~$75 | 香港仔 | ~$150+隧 | 粉嶺 | ~$145+隧 |
土瓜灣 | ~$75 | 鴨利洲 | ~$150+隧 | 西貢 | ~$145 |
慈雲山 | ~$75 | 薄扶林 | ~$155+隧 | 洪水橋 | ~$150 |
黃大仙 | ~$75 | 數碼港 | ~$155+隧 | 上水 | ~$150+隧 |
彩虹 | ~$75 | 西半山 | ~$170+隧 | 元朗 | ~$160 |
順利村 | ~$75 | 深水灣 | ~$160+隧 | 天水圍 | ~$160 |
青衣 | ~$80 | 淺水灣 | ~$160+隧 | 大棠 | ~$160 |
秀茂坪 | ~$80 | 赤柱 | ~$165+隧 | 落馬洲 | ~$160 |
藍田 | ~$80 | 山頂 | ~$175+隧 | 流浮山 | ~$185 |
油塘 | ~$85 | 大潭 | ~$175+隧 | 東涌 | ~$200 |
觀塘 | ~$85 | 石澳 | ~$190+隧 | 將軍澳 | ~$105+隧 |
隧道費及橋費 | |
紅磡隧道 | $50 |
東區隧道 | $50 |
西區隧道 | $50 |
香港仔隧道 | $5 |
大老山隧道 | $24 |
獅子山隧道 | $8 |
將軍澳隧道 | $3 |
城門隧道 | $5 |
尖山隧道/沙田嶺隧道 | $8 |
大欖隧道 | $64 |
青馬隧道/青嶼幹線 | -- |
柏麗灣專區橋費(上午10時至下午4時) | $40 |
愉景灣隧道(每日上午9時至下午6時) | $120 |
愉景灣入閘登記費 | $24 |
Pick up in store:
We will send you a WhatsApp message to inform you when the goods are ready. You can choose Sham Shui Po or Mong Kok to pick up the goods. You are required to show the message when you pick up the goods.
S.F. Express
The first 1kg shipping cost is HK$30.
Subsequent weight (per 0.5 kg) HK$6.
The weight of the shipment is calculated as the actual weight or the volume of the material, whichever is the heavier. The formula for calculating the volume of the volume is: length X width X height (cm) / 6000.
The above shipping costs do not include non-business add-on (HK$30).
Van Delivery Service
The delivery charges are listed in the table above, while tunnel fees and other expenses such as parking are excluded. The delivery service is provided by third party such as GoGoVan. You need to pay for the delivery charges when the driver arrives at your location and hand over the goods. Please note it is not a door to door service. You need pick up the goods at a nearest area that possible for the van to stop a while. Please keep your phone on so that the driver can contact you during delivery.
Kowloon | Hong Kong Island | New Territories | |||
Sham Shui Po | ~$60 | Wan Chai | ~$140+ tunnel | Tai Wai | ~$100+ tunnel |
Cheung Sha Wan | ~$60 | Causeway Bay | ~$140+ tunnel | Sha Tin | ~$100+ tunnel |
Mobil | ~$65 | North Point | ~$140+ tunnel | Fotan | ~$100+ tunnel |
Tai Kok Tsui | ~$65 | Quarry Bay | ~$140+ tunnel | Deep well | ~$105 |
Mong Kok | ~$65 | Tsuen Wan | ~$140+ tunnel | Well tree | ~$105 |
Yau Ma Tei | ~$65 | Happy Valley | ~$145+ tunnel | Jiubei Mountain | ~$110 |
Jordan | ~$70 | Chai Wan | ~$145+ tunnel | Ma On Shan | ~$115+ tunnel |
Kowloon City | ~$70 | Hong Kong University | ~$155+ tunnel | Middle to large | ~$115+ tunnel |
Kwai Chung | ~$70 | Western ring | ~$145+ tunnel | Xiaolan | ~$120 |
Scenery | ~$70 | Sai Ying Pun | ~$145+ tunnel | HKUST | ~$125 |
Tsim Sha Tsui | ~$70 | Sheung Wan | ~$145+ tunnel | Tai Po | ~$130+ tunnel |
Jiu Long Tang | ~$75 | Central | ~$145+ tunnel | Ma Wan | ~$130+ tunnel |
Tsuen Wan | ~$75 | Wong Chuk Hang | ~$145+ tunnel | Trick | ~$135 |
He Wentian | ~$75 | Jardine's Lookout | ~$150+ tunnel | Blue land | ~$145 |
Hung Hom | ~$75 | Hong Kong guy | ~$150+ tunnel | Fanling | ~$145+ tunnel |
To Kwa Wan | ~$75 | Ap Lei Chau | ~$150+ tunnel | Saigon | ~$145 |
Tsz Wan Shan | ~$75 | Pokfulam | ~$155+ tunnel | Flood bridge | ~$150 |
Wong Tai Sin | ~$75 | Cyberport | ~$155+ tunnel | Sheung Shui | ~$150+ tunnel |
rainbow | ~$75 | Mid-Levels West | ~$170+ tunnel | Yuen Long | ~$160 |
Smooth village | ~$75 | Deep Water Bay | ~$160+ tunnel | Tin Shui Wai | ~$160 |
Tsing Yi | ~$80 | Repulse Bay | ~$160+ tunnel | Daxie | ~$160 |
Sau Mau Ping | ~$80 | Stanley | ~$165+ tunnel | Lok Ma Chau | ~$160 |
Lantian | ~$80 | Peak | ~$175+ tunnel | Liufu Mountain | ~$185 |
Oil pond | ~$80 | Tai Tam | ~$175+ tunnel | Tung Chung | ~$200 |
Kwun Tong | ~$85 | Shi O | ~$190+ tunnel | Tseung Kwan O | ~$105 + tunnel |
Toll and bridge fees | |
Hung Hom Tunnel | $50 |
Eastern Tunnel | $50 |
Western District Tunnel | $50 |
Aberdeen Tunnel | $5 |
Tate's Cairn Tunnel | $24 |
Lion Rock Tunnel | $8 |
Tseung Kwan O Tunnel | $3 |
City gate tunnel | $5 |
Jianshan Tunnel / Sha Tin Ridge Tunnel | $8 |
Tai Lam Tunnel | $64 |
Tsing Ma Tunnel / Lantau Link | -- |
Bay of Perry Bay Bridge Fee (10 am to 4 pm) | $40 |
Discovery Bay Tunnel (9 am to 6 pm daily) | $120 |
Discovery Bay Entrance Registration Fee | $24 |